The Process:
Note: I deviated from the Pinterest pin in that I didn't use Scrabble tiles. Unless I can get Scrabble tiles easily and in bulk somewhere I like my Scrabble tiles where they are currently; with my Scrabble game.
You will need:
- small wooden craft blocks

- Pencil
- Sharpie marker
- Mod Podge
- Magnetic tape
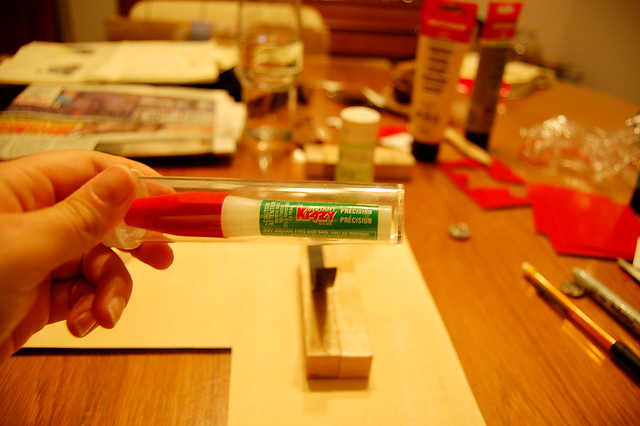
- Krazy Glue (optional)
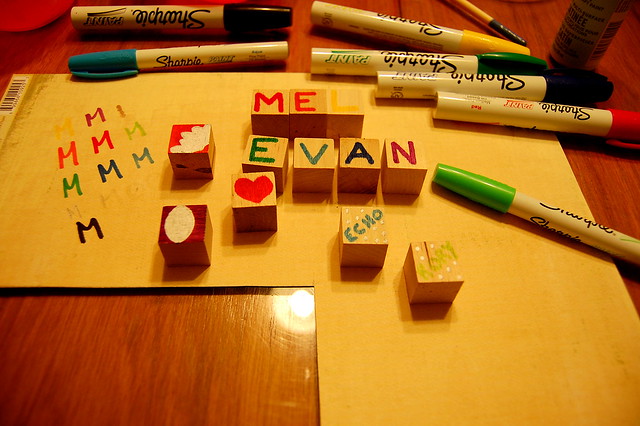
First I traced my letters onto the blocks using my trusty mechanical pencil. You don't *have* to do this, I did this because I didn't want to risk ruining a perfectly good cube with my sometimes horrific printing.

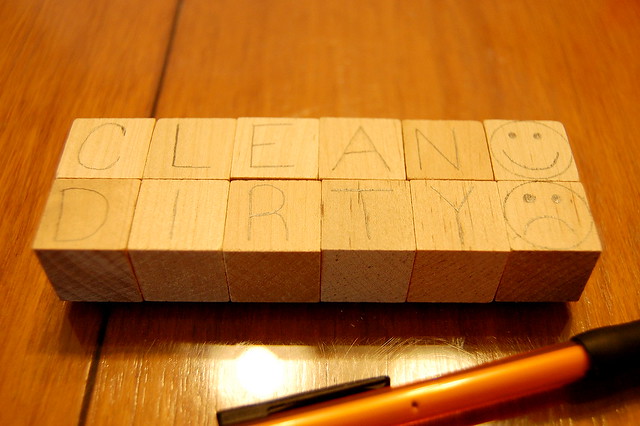
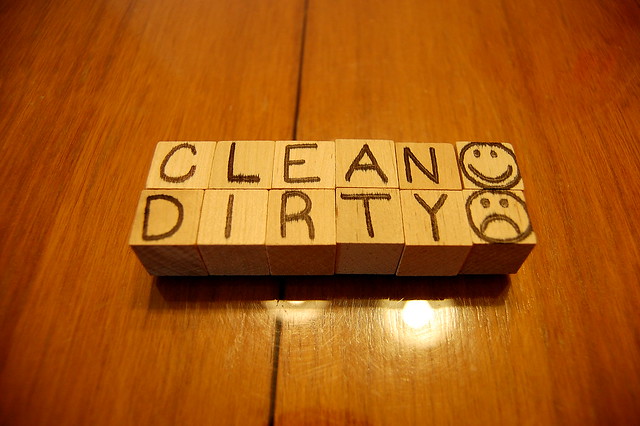
After I finished tracing I then went over it with my Sharpie marker.
Pro Tip: Don't use a Sharpie Marker. It will bleed into the grain of the wood and distort your letters. Use letter stickers instead.
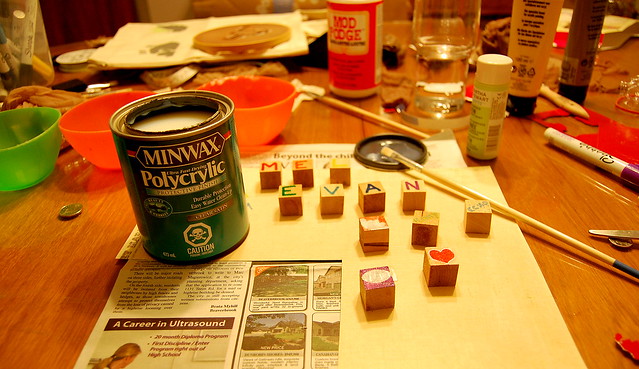
Now start Mod Podging everything together!!!

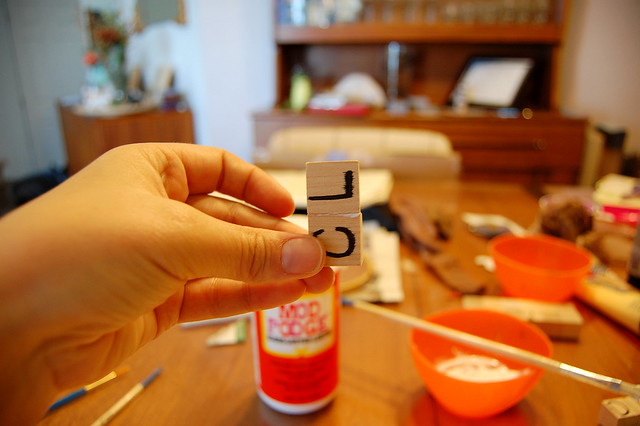
Pro Tip: I recommend gluing them together in sections. That way you don't risk the blocks being misaligned.

Once the Mod Podge is dry on your sections, glue them together to create you "Clean :)" and "Dirty :(".

Once your two columns are dry, you can proceed to stick them together to create one column.
Pro Tip: Make sure you glue them together correctly, so that when you flip it around the word you desire is upright. Otherwise, this whole project is moot, and you end up with a bunch of blocks stuck together that serve absolutely no purpose.

Now stick'em together, and cover it all with a thick layer of Mod Podge to seal the wood.

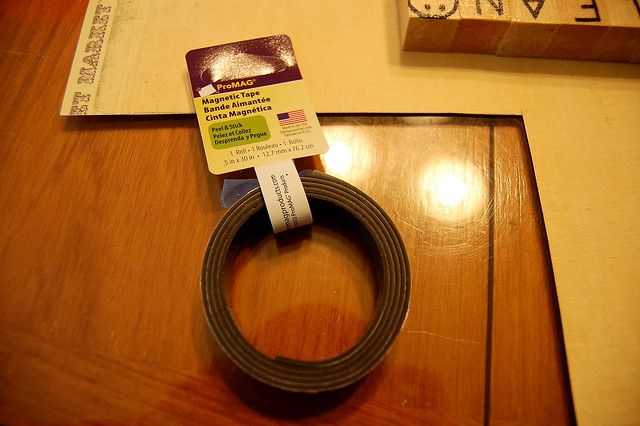
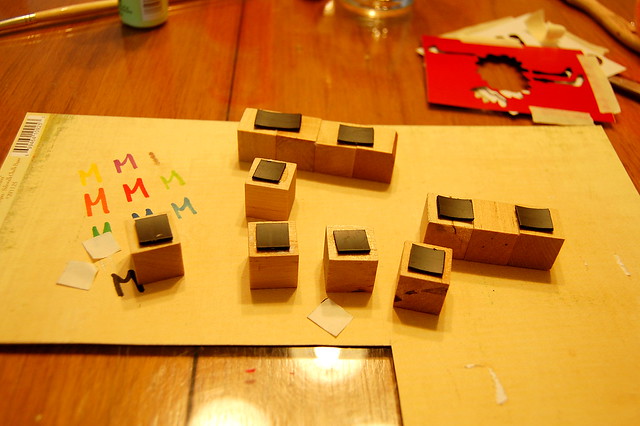
Once dry, whip out your magnetic tape and cut two pieces just slightly shorter than the length of your wooden blocks.
Pro Tip: Use the strongest magnets you can track down. The stuff I used was kinda meh, but it was super cheap.
Now Mod Podge (or optionally Krazy Glue) those two magnetic strips to the back of your wooden blocks.
Pro Tip: If you are using magnet that came in a roll you will have to hold down the two strips on the wood until the glue is almost dry otherwise they will curl and you'll have to start the gluing process all over again. Lame.
Once the glue is fully dried you're finished! Now go stick that beautiful and useful magnet to your dishwasher!

Ta Da! Now you know when the dishes are clean or dirty without having to open the dishwasher!
Total Approximate Cost: Wooden Blocks - $5, Magnetic Tape - $3, = $8
(Everything else I had laying about already from previous projects.)
I had a bunch of leftover blocks, and felt that my fridge could use some lovin' as well. I used my Sharpie Paint Markers for these, and they definitely bled less than the regular ole Sharpie.
Also, to seal them, instead of using Mod Podge on these ones I used Minwax Polycrylic. This finish maintained a natural look on the wooden blocks, whereas the Mod Podge creates a gloss finish.
Then I Mod Podged them together, and stuck some magnets on the back.
Then once they were dry I stuck'em to ye olde refrigerator.

Pro Tip: (more like Derp Tip, but I digress) Make sure the glue is super dry before sticking your magnets to the fridge. Otherwise the glue will give way and they will come crashing to the floor, and you will have to glue everything back together again. Just sayin'.
Have you ever done a magnet project like this? What cool magnets did you make? Do you have any Pro Tips (or Derp Tips, I'm not picky, and knowledge is power) to share that could improve this project? Please comment below or reach me on the Twitter @PinterMel.
Cheers!
-Melissa
No comments:
Post a Comment